
Stroke Saver
Ballymoney Golf Club’s par 71 parkland course is a great challenge for golfers of all levels, whether you're a seasoned player or just getting started. Playing 6,337 yards from the white tees, it’s a beautifully kept course with mature trees and smooth greens - perfect for an enjoyable round, no matter your experience!
Choose a hole for more information.

Hole 1 | PAR 4 | Index 6
Members Advise
An opening shot up to the corner
leaves your safest approach to the
right hand side of the green, which
slopes back left to front right. If you
can make par you’ll have done well.
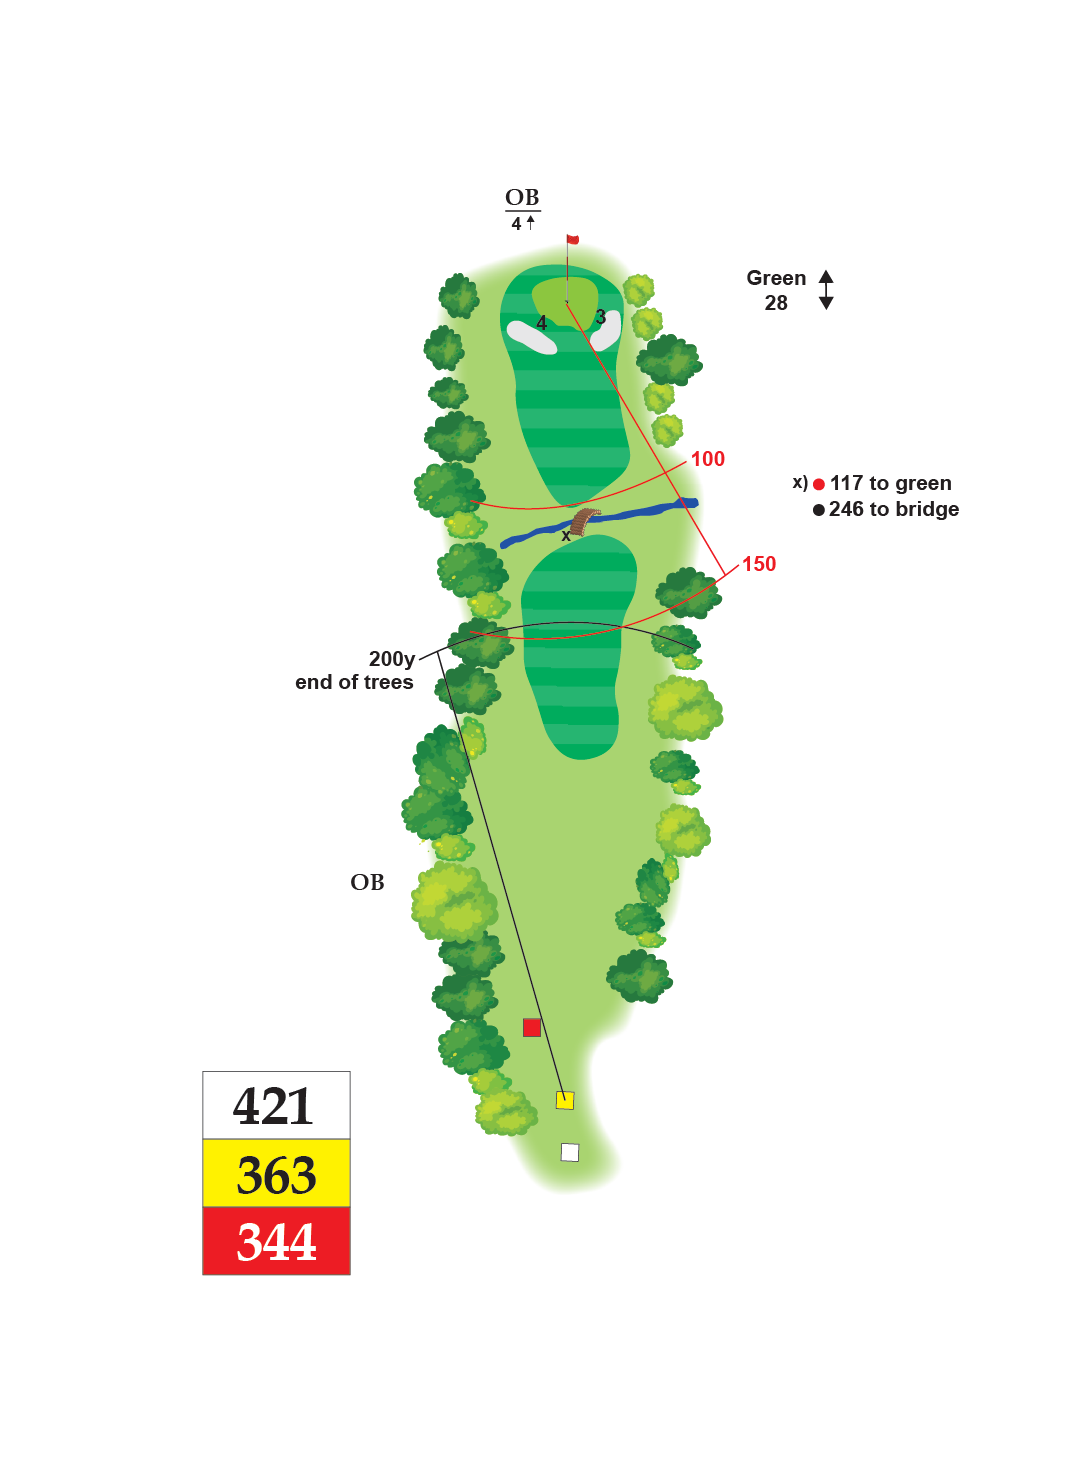
Hole 2 | PAR 4 | Index 4
Members Advise
A good tee shot will leave you on
top of the slope before the water,
bigger hitters can take it on at their
peril. The green is two tier and can
be deceiving but has OB long.
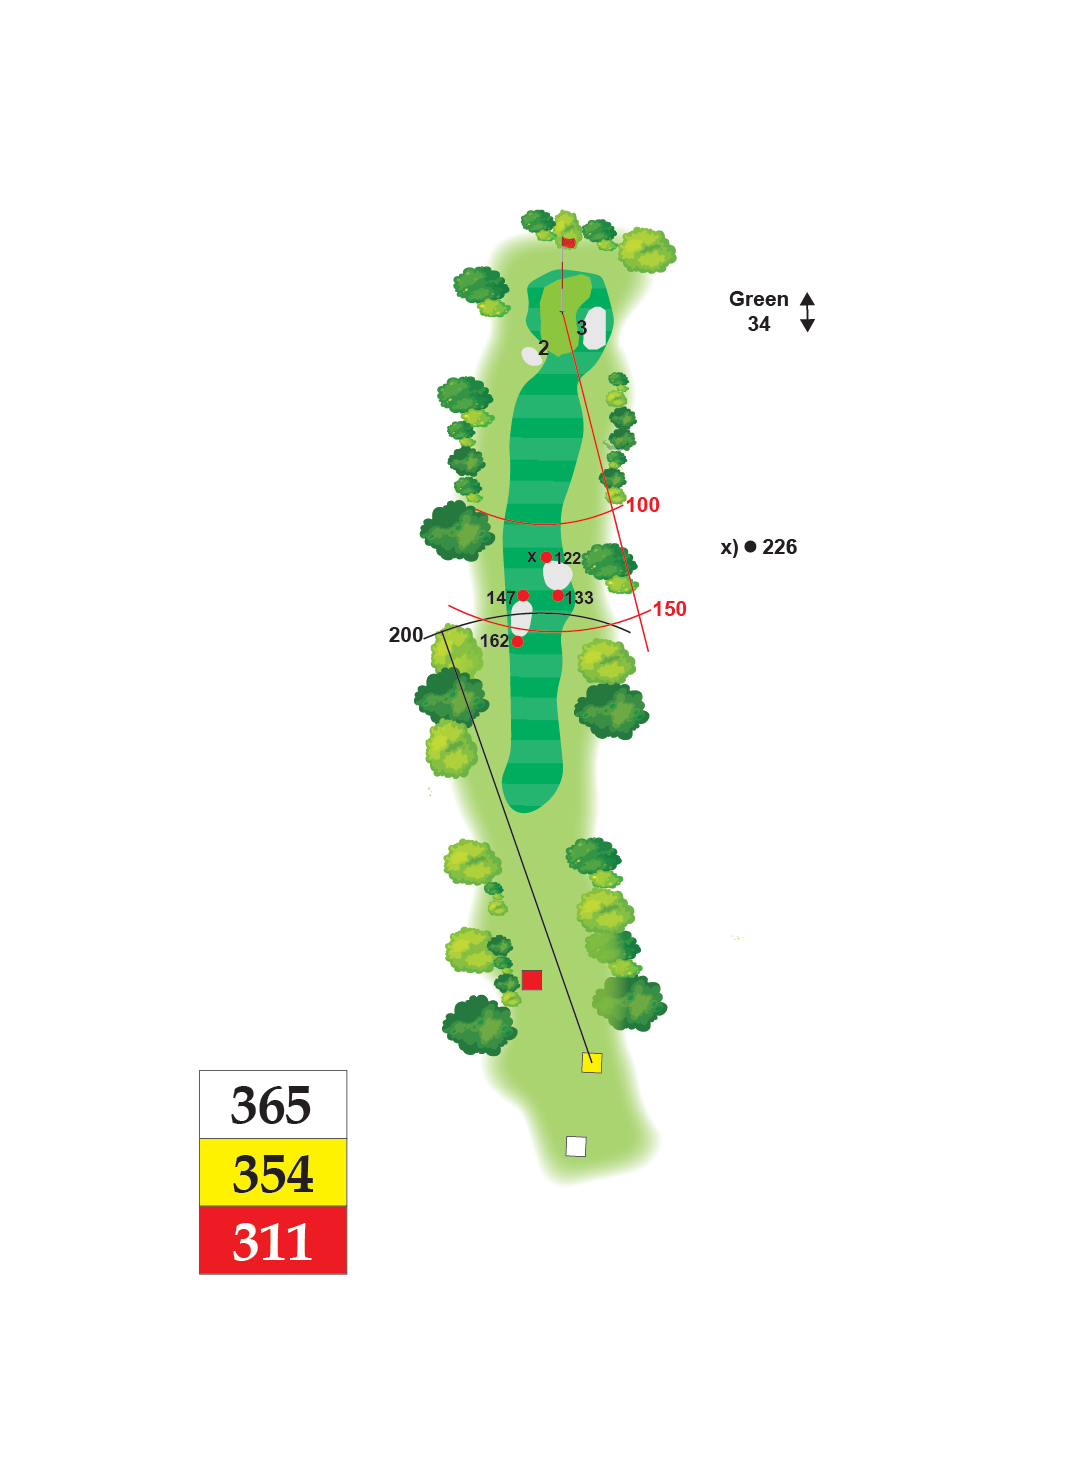
Hole 3 | PAR 4 | Index 8
Members Advise
A faders delight as the slight
dogleg turns in the landing area.
Avoiding the bunkers on
approach is essential.
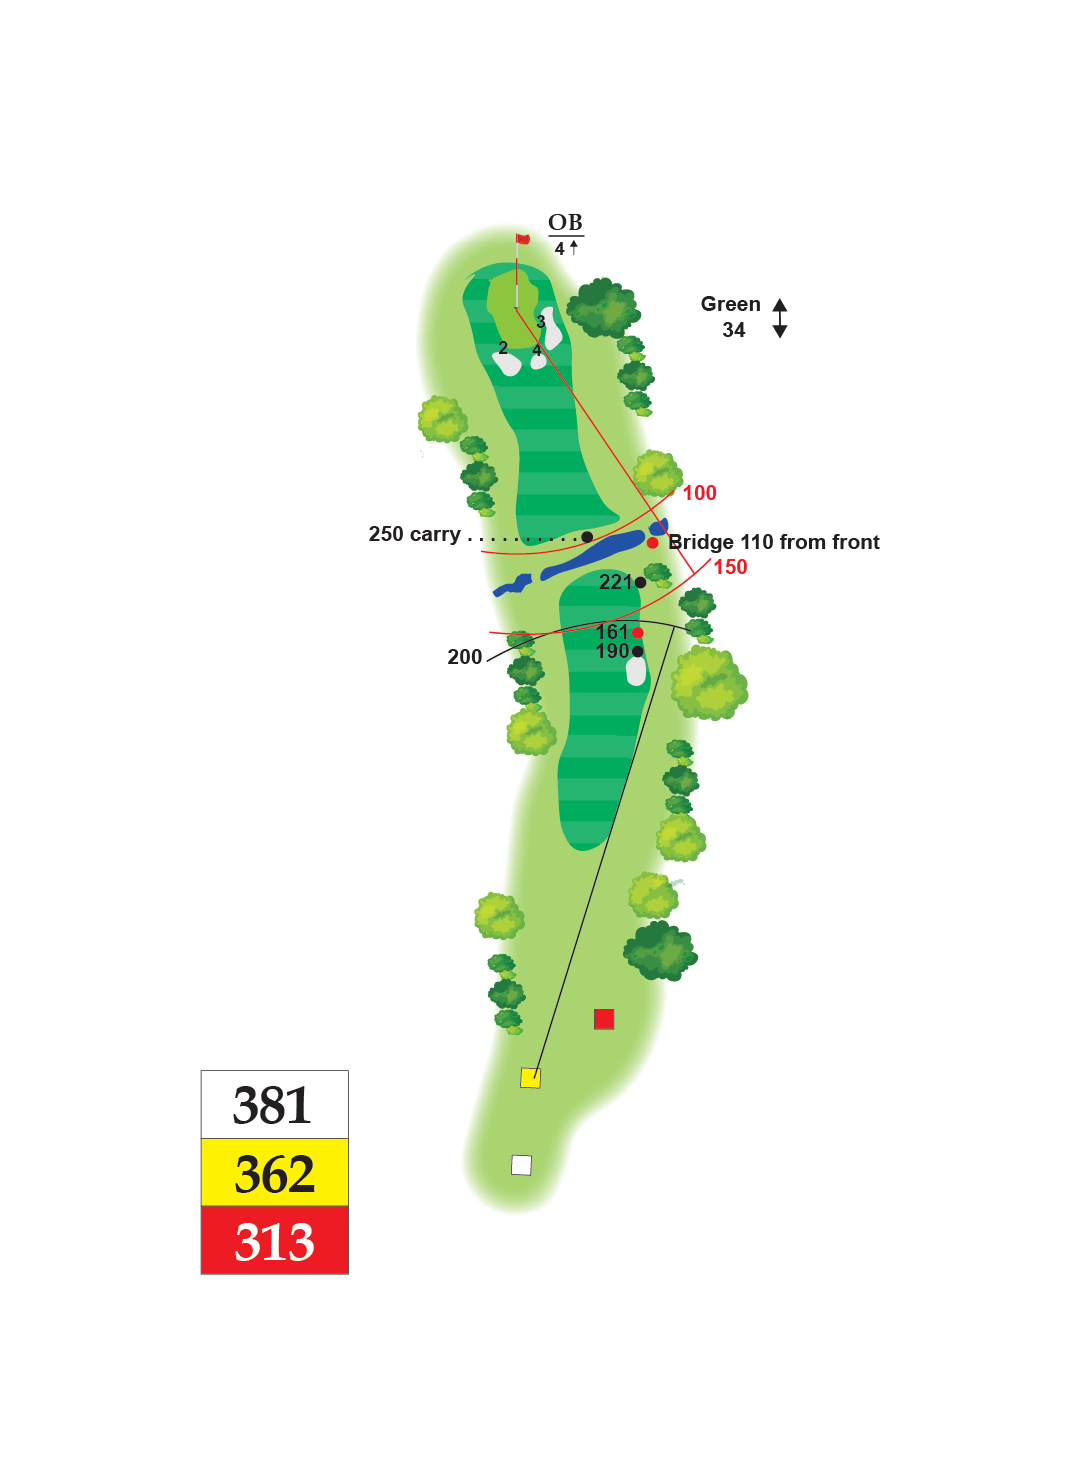
Hole 4 | PAR 4 | Index 12
Members Advise
Similar to the second but a much
tighter approach is needed and
the bunkers catch anything shy
though a ditch awaits those over hit.
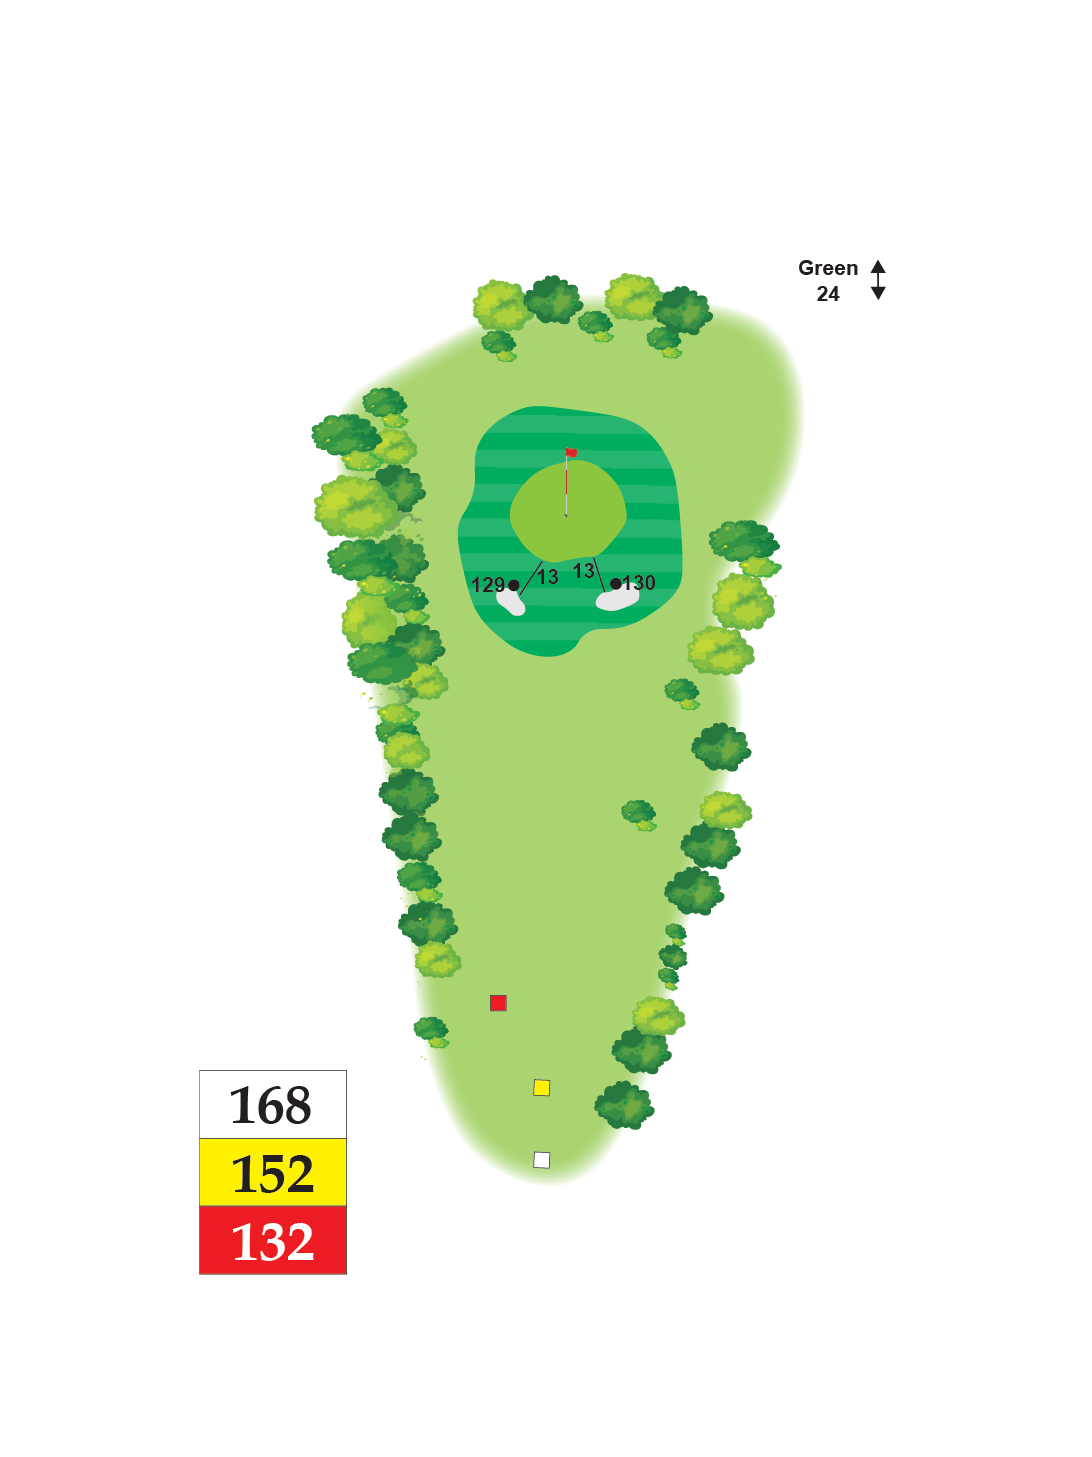
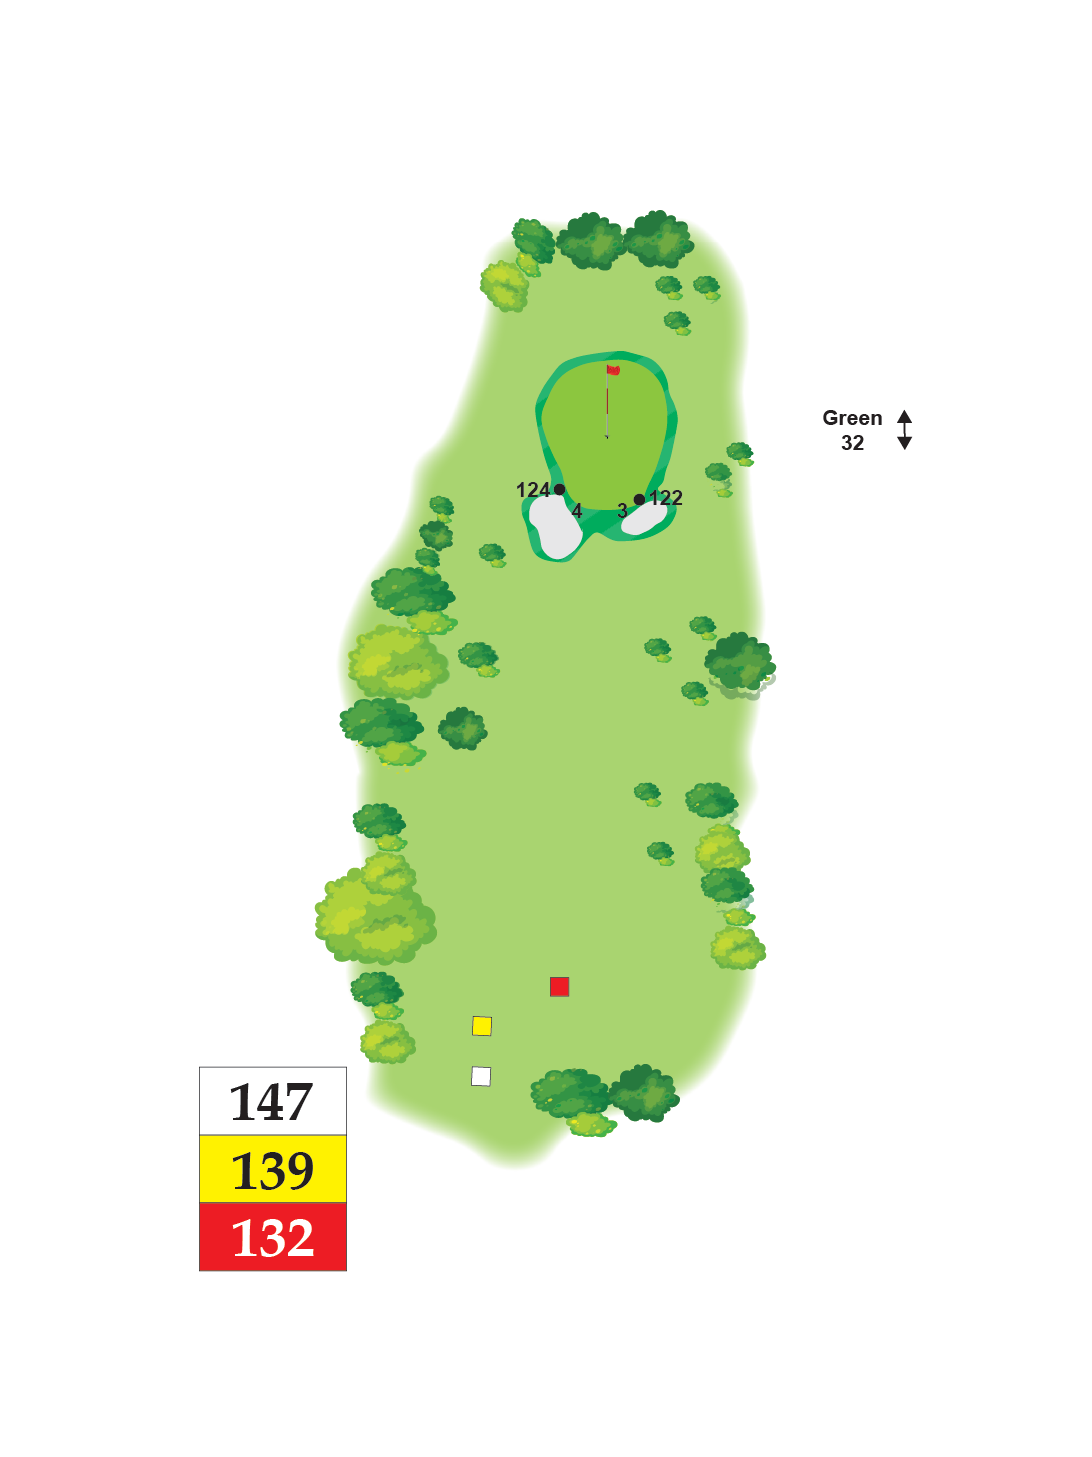
Hole 5 | PAR 3 | Index 14
Members Advise
Short but deceiving par 3 to a green that
some are convinced is the flattest on the
course. Short is better than long here.
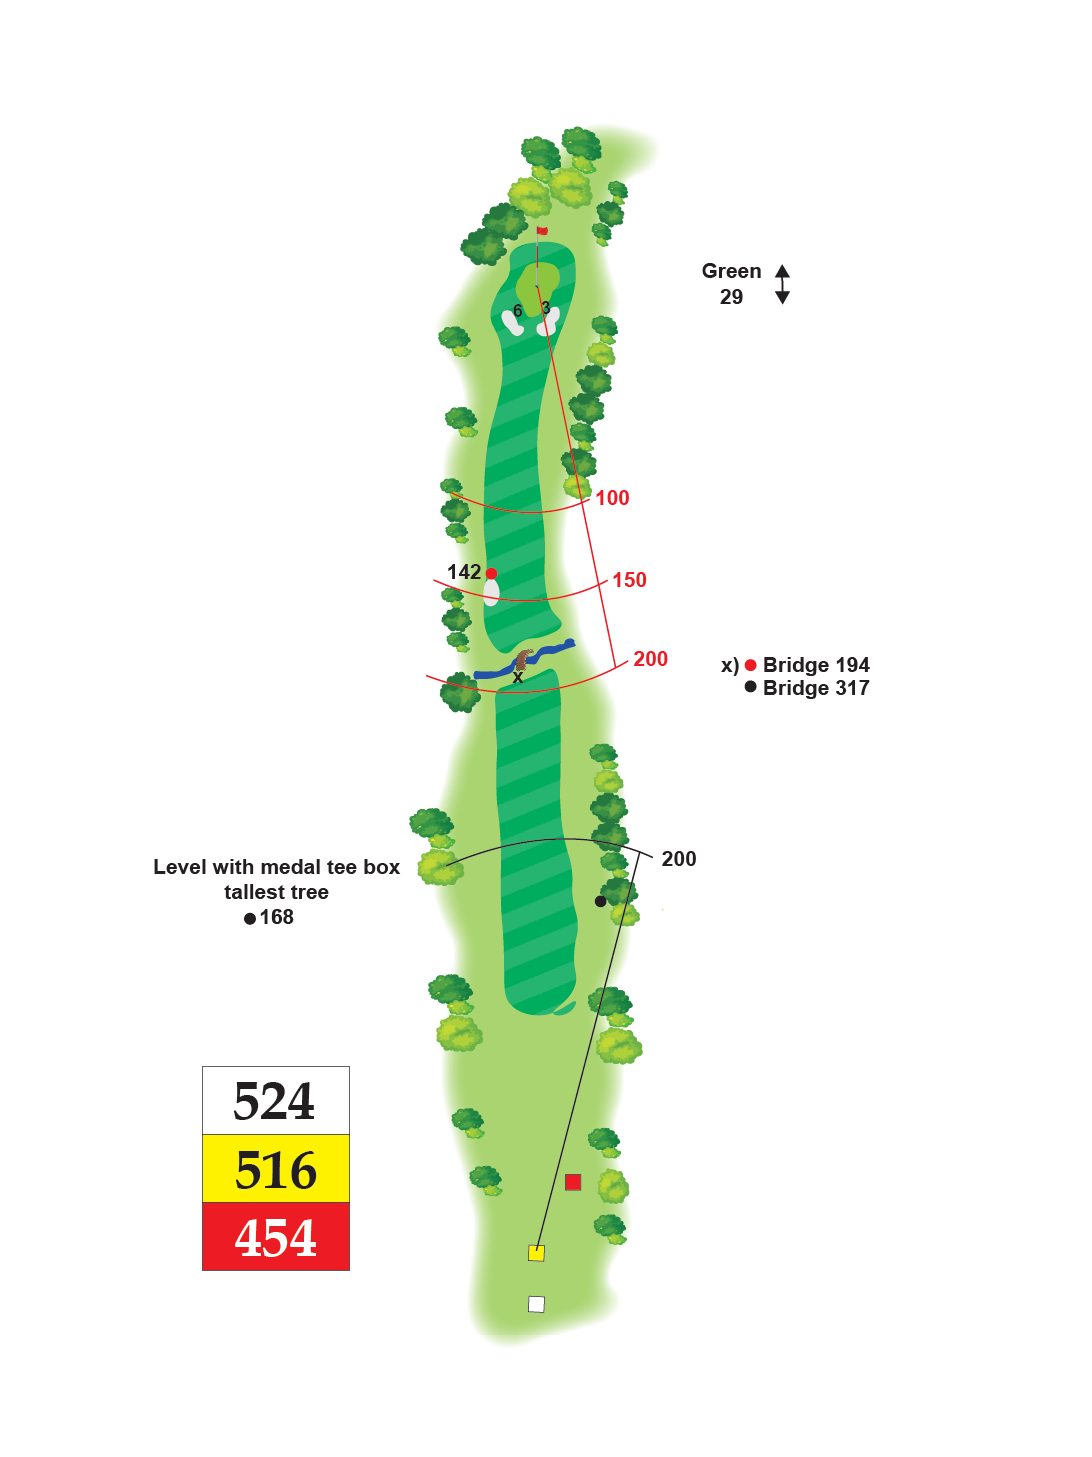
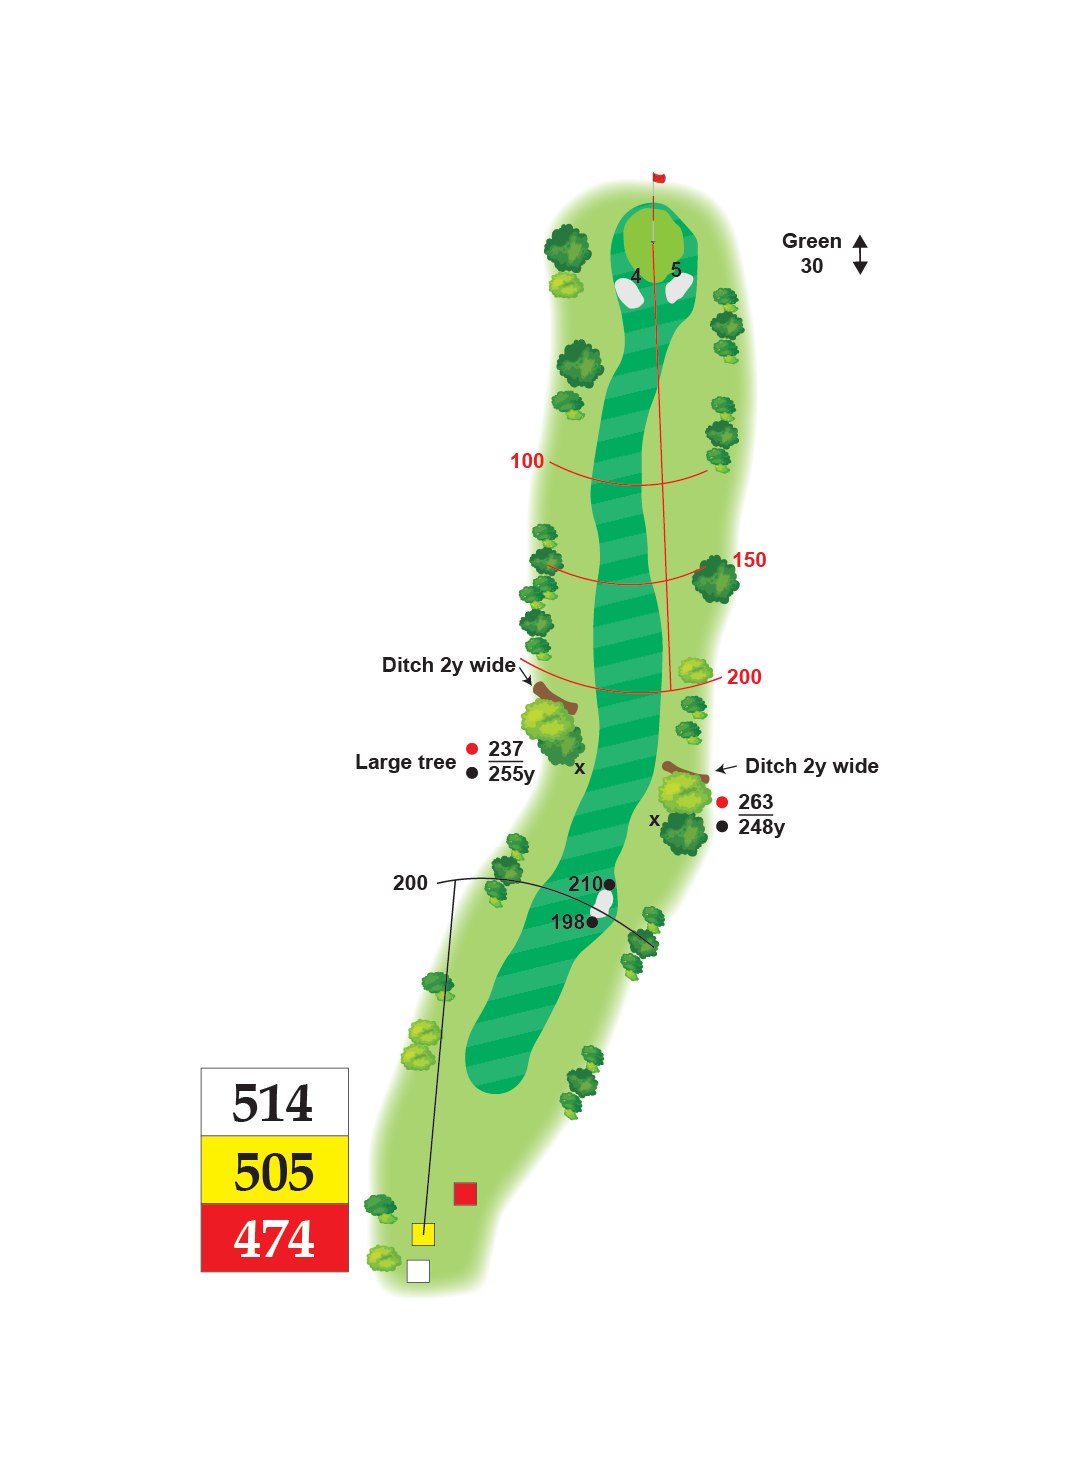
Hole 6 | PAR 5 | Index 10
Members Advise
Usually into the wind the water
shouldn’t trouble any but catches
more than it’s share of second
shots. Keep to a three shot
strategy and you should have
a putt for par.
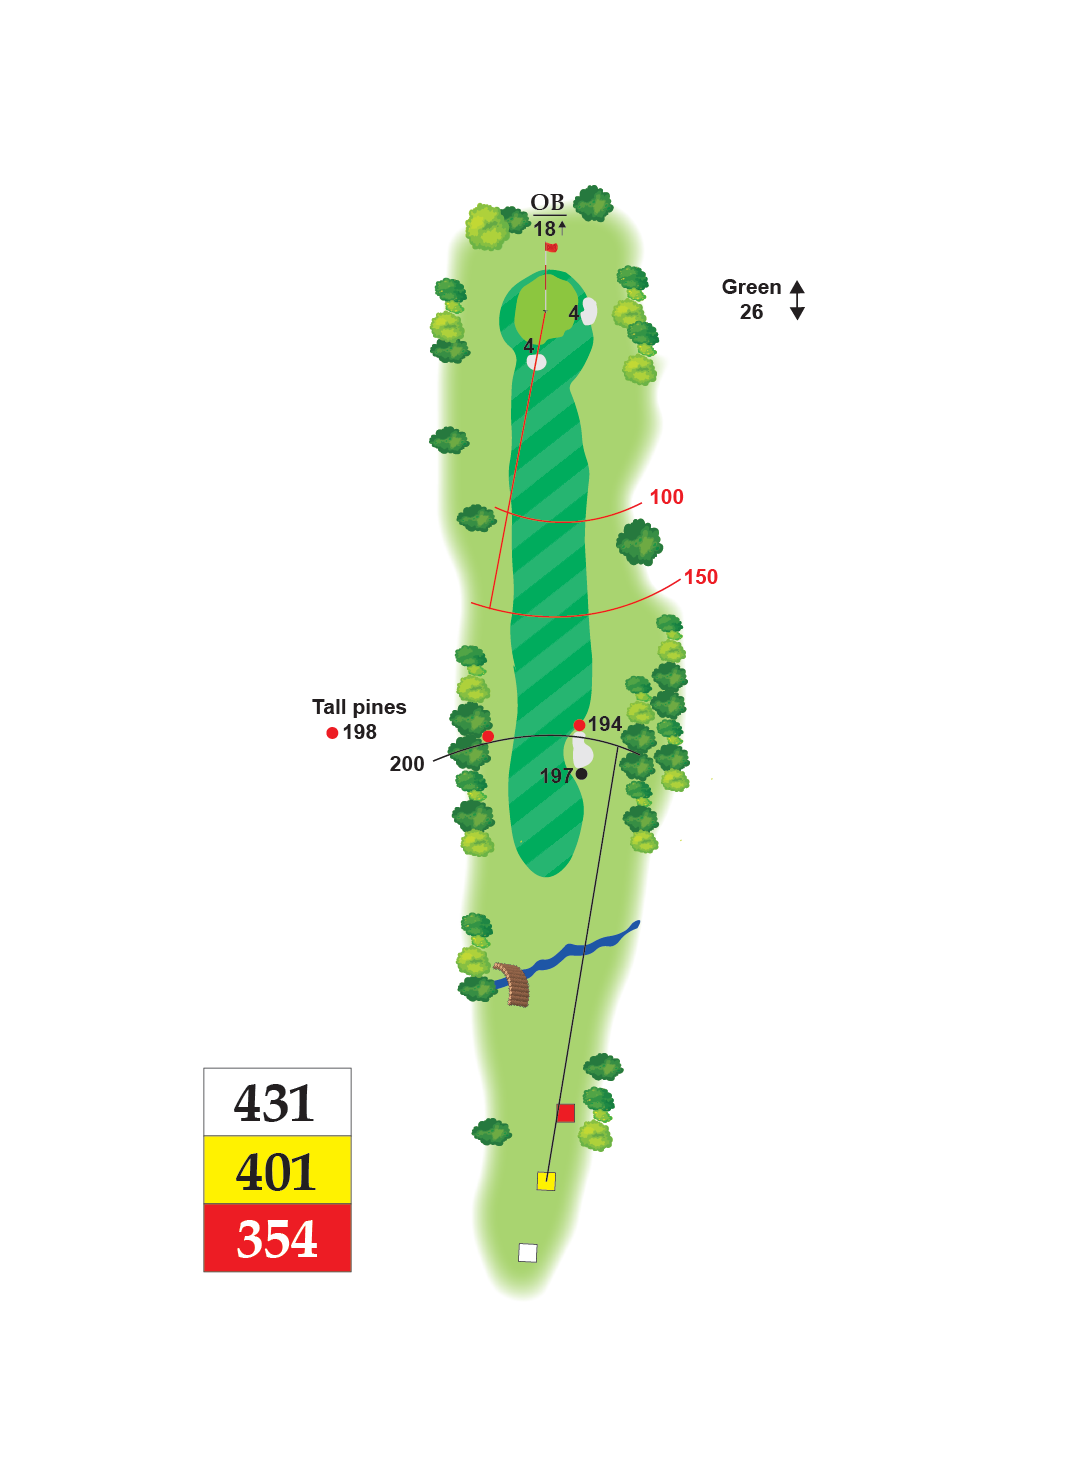
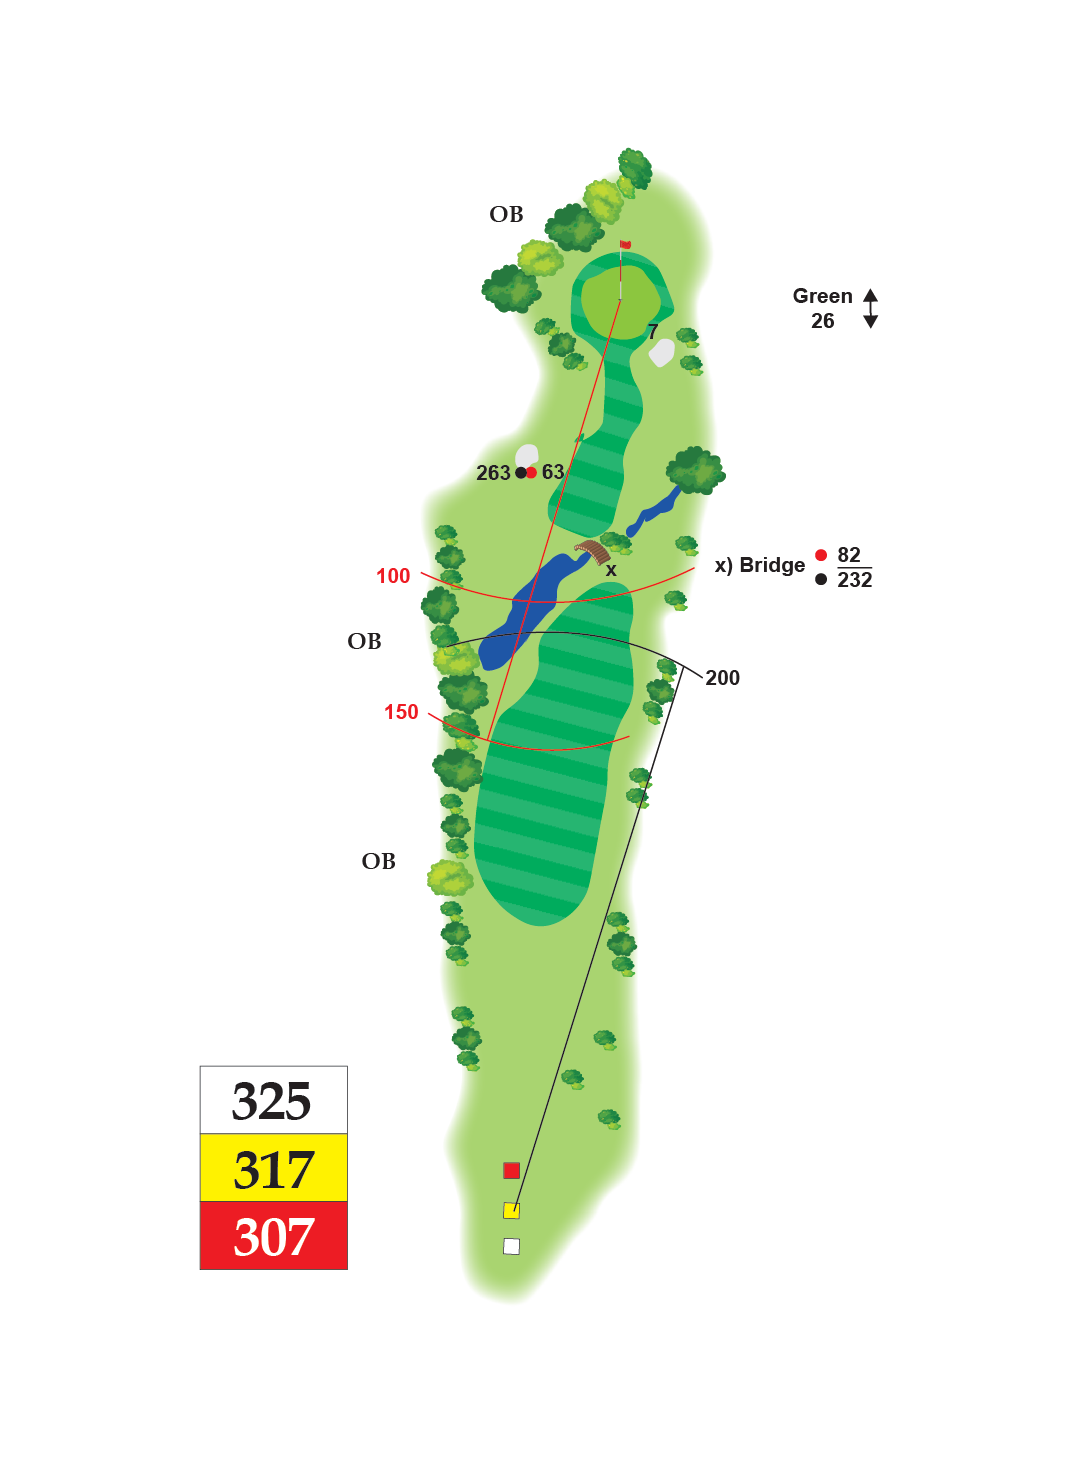
Hole 7 | PAR 4 | Index 2
Members Advise
A deceptively long hole that asks
good questions of your longer
clubs on approach but too much
and you’ll have to ask the
neighbour for your ball back.
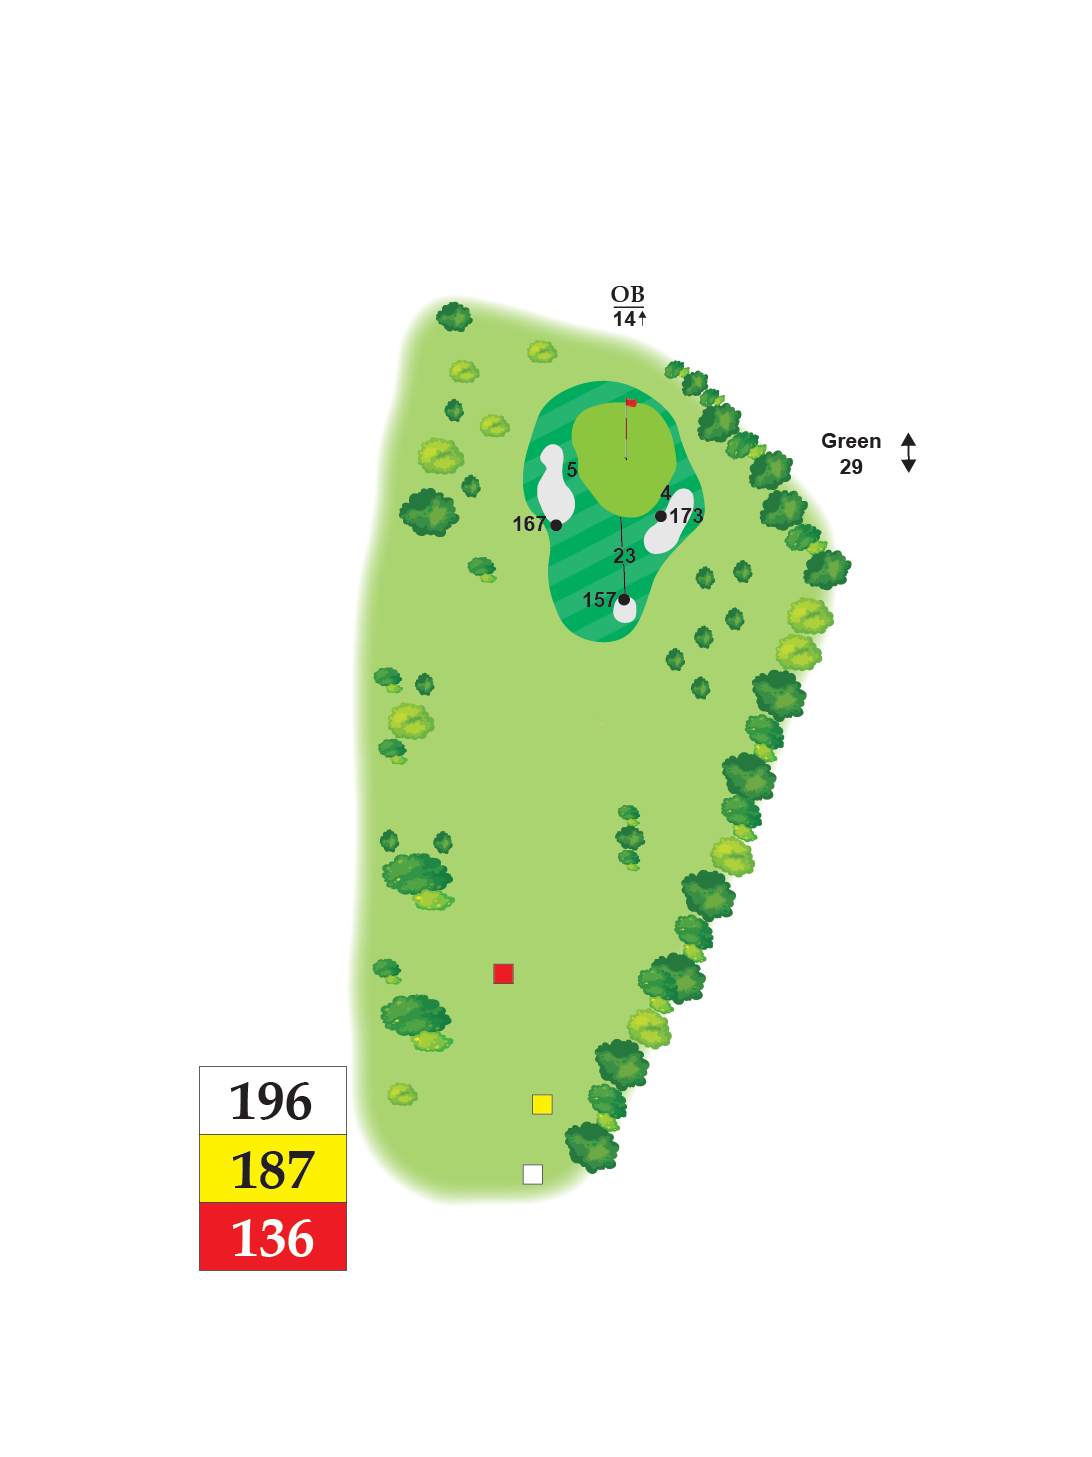
Hole 8 | PAR 3 | Index 18
Members Advise
A very deceptive index 18. There are very few
“easy” pins here but pars are achievable
if you can find the dance floor.
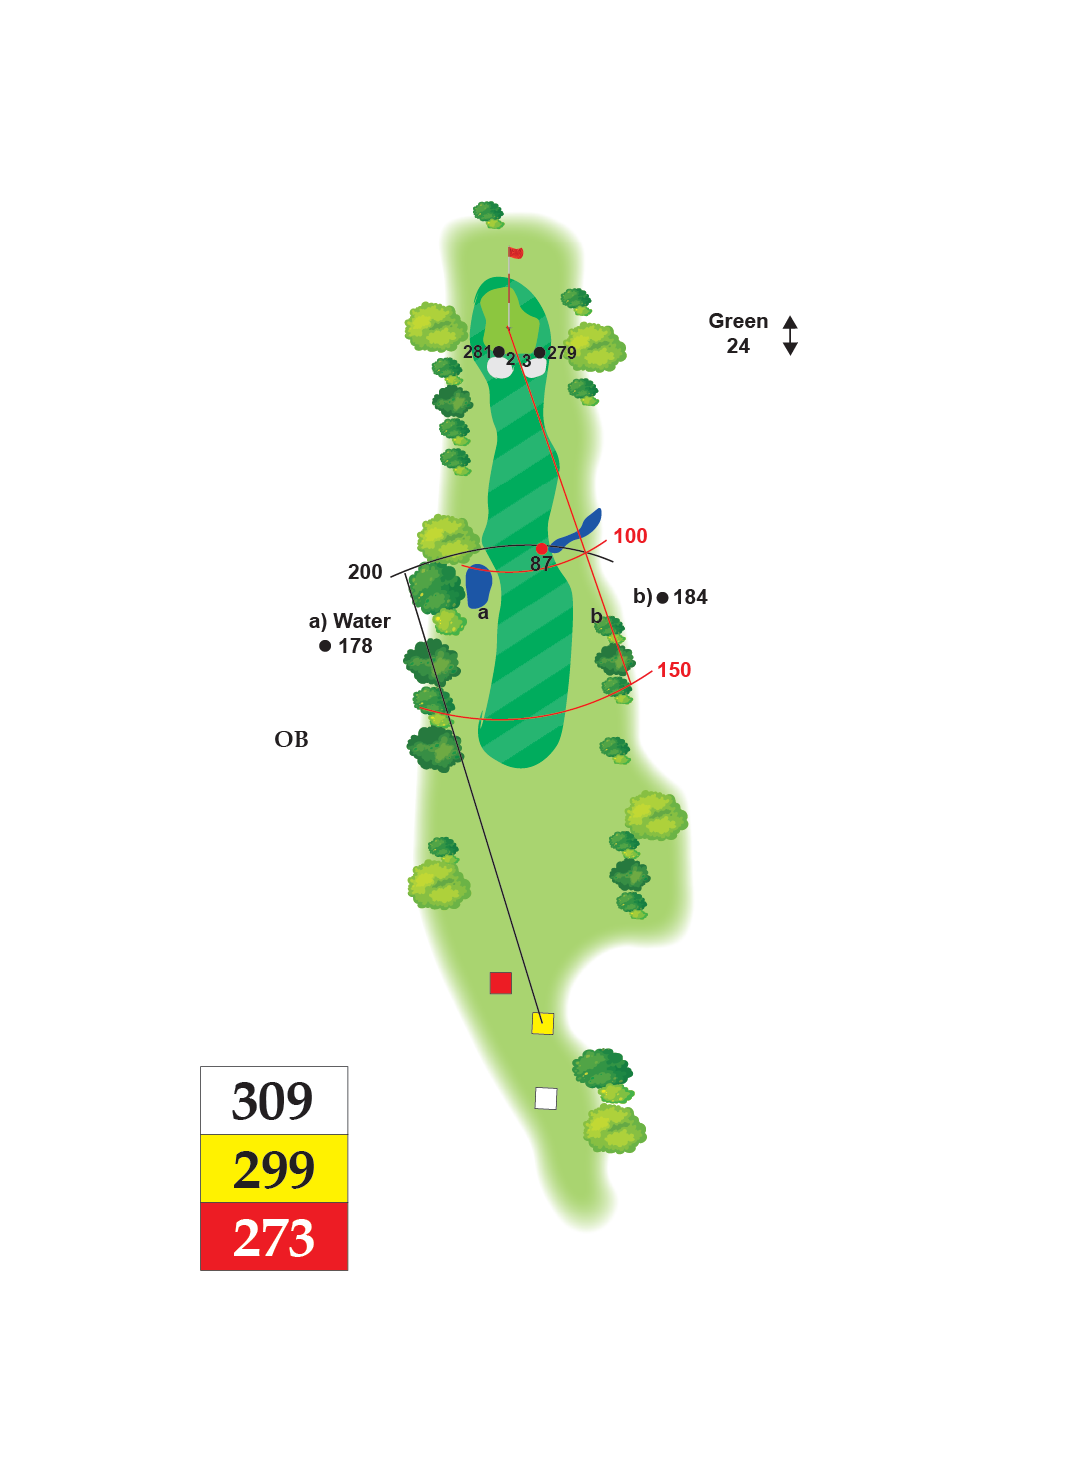
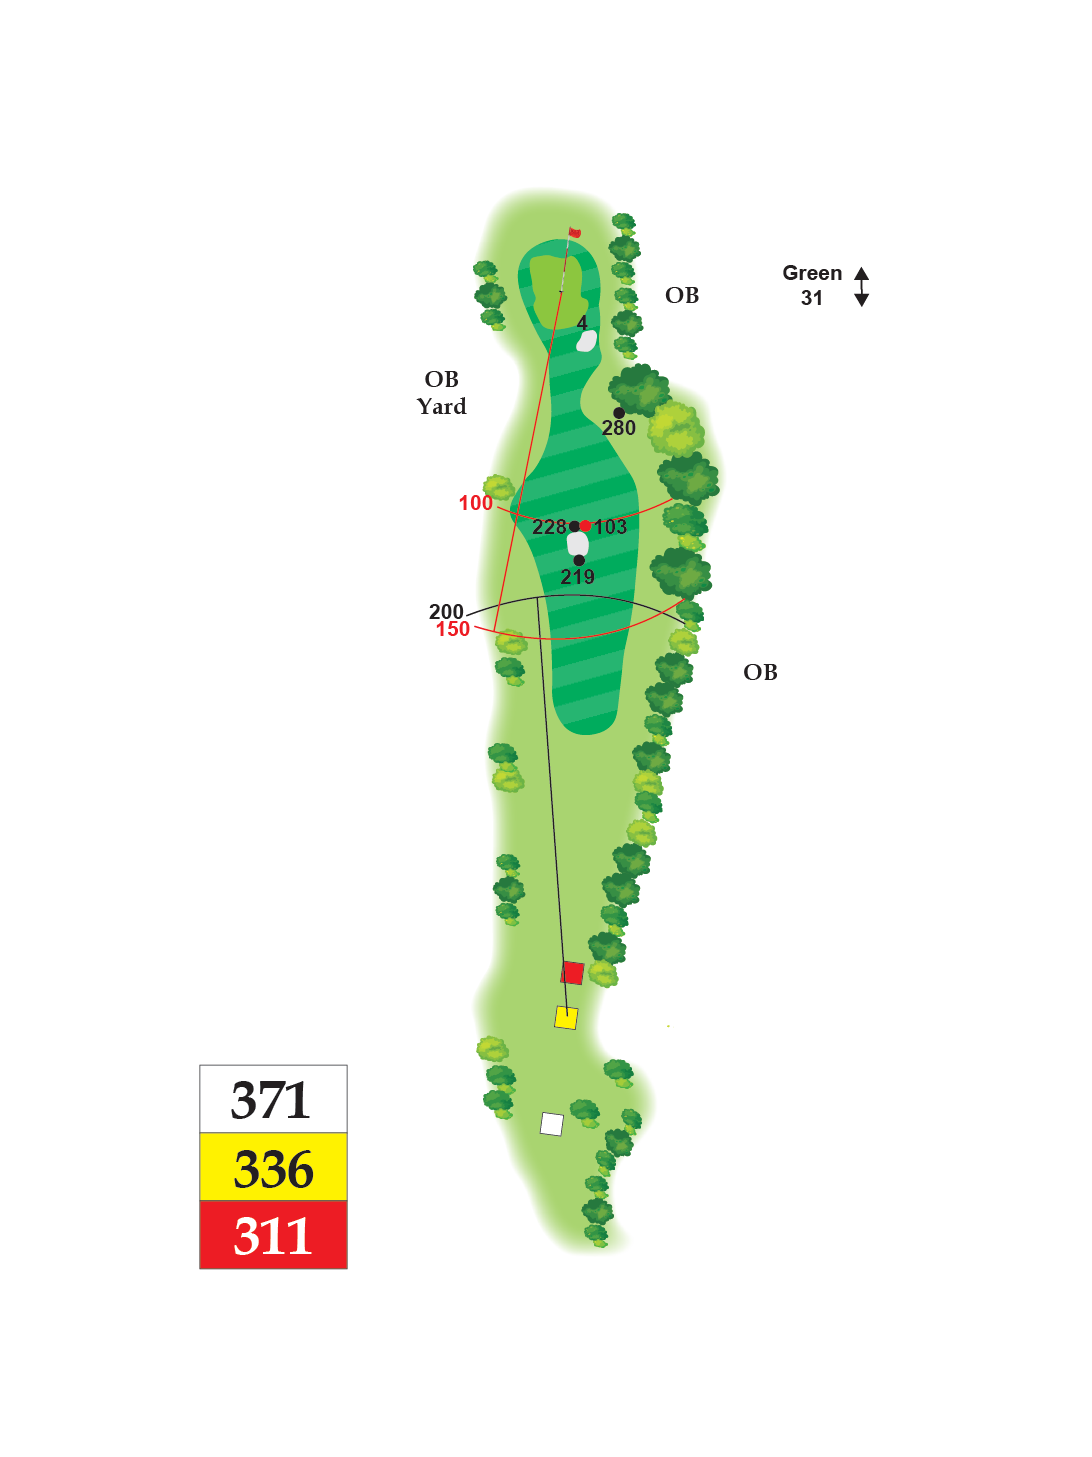
Hole 9 | PAR 4 | Index 16
Members Advise
With OB on the left and water in
the landing zone of most this
can be tricky but it’s risk/reward
to finish the front 9 and add
a birdie.
Hole 10 | PAR 4 | Index 9
Members Advise
Best choice is an iron off the
tee for most, it will give you a
clear shot at the green and a
makeable two putt. With
water in play for all will you
dare take a chance?
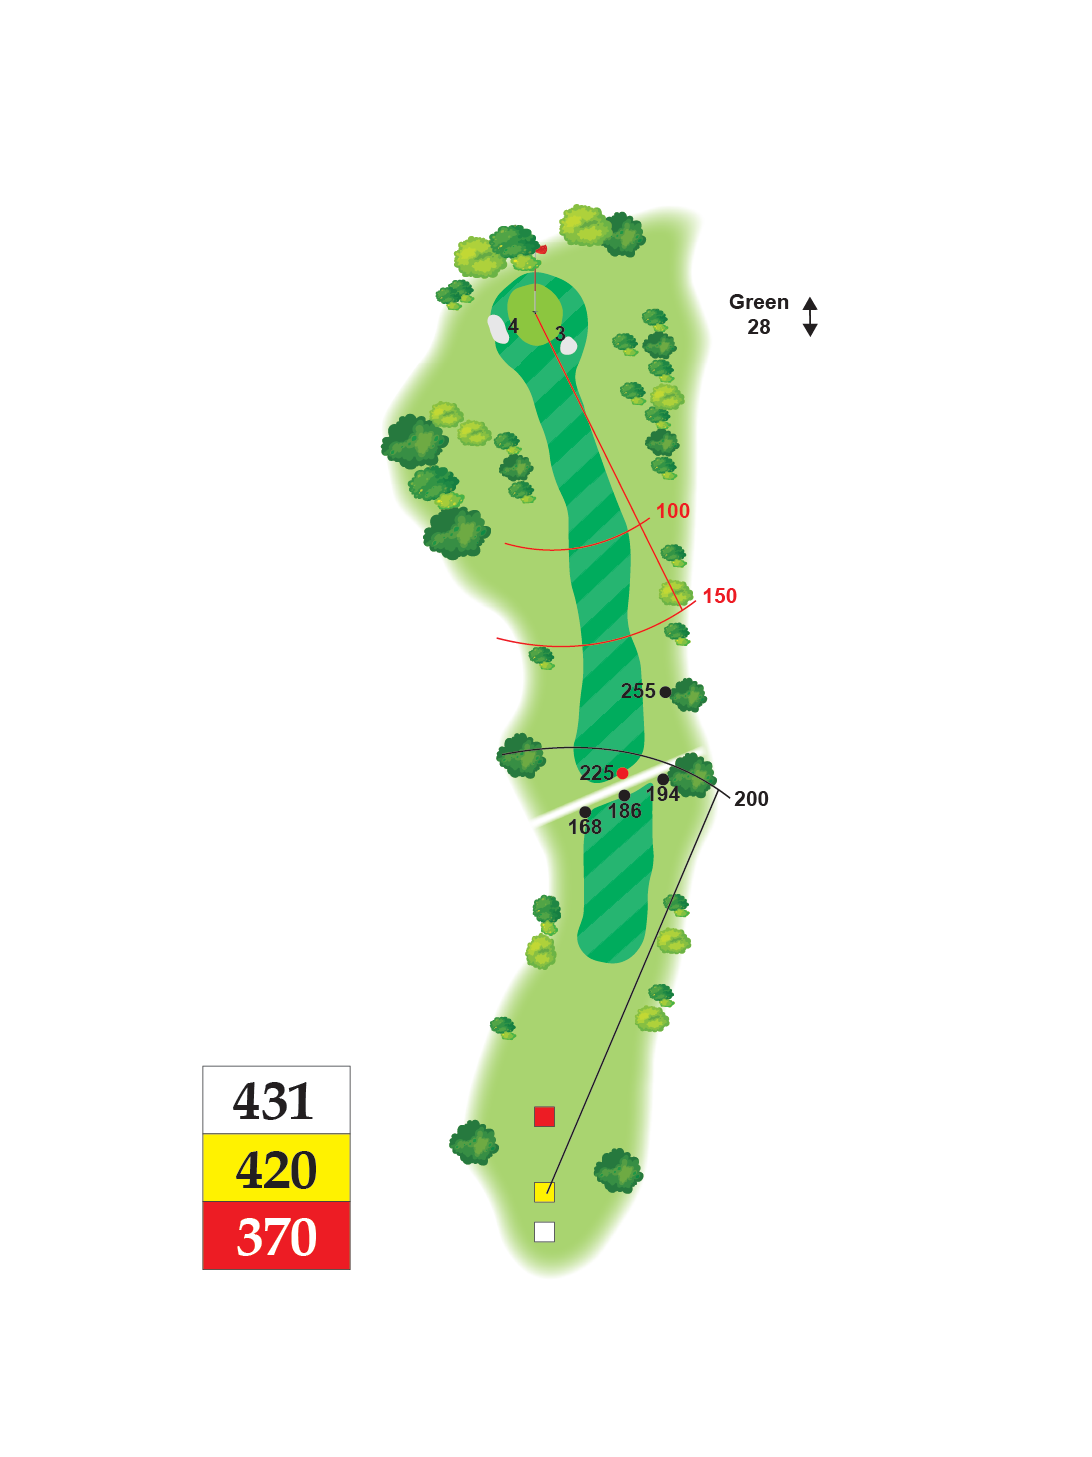
Hole 11 | PAR 4 | Index 1
Members Advise
A long dogleg left usually needs
a long metal wood approach to
a tricky green where most leave
happy with a bogey.
Hole 12 | PAR 4 | Index 17
Members Advise
Drivable for the bigger hitters but
with its own risks of a watery finish
beyond. A good play here is to find
the fairway and land to the front
of the green.
Hole 13 | PAR 4 | Index 13
Members Advise
A Bombers delight, a huge fairway
to hit but too far either side means
trees come into play. Find the
fairway with your second as the
trees narrow and you’ll have a great
sight of the green as you try to
capitalise. A tricky green with a
hidden ridge on the left side.
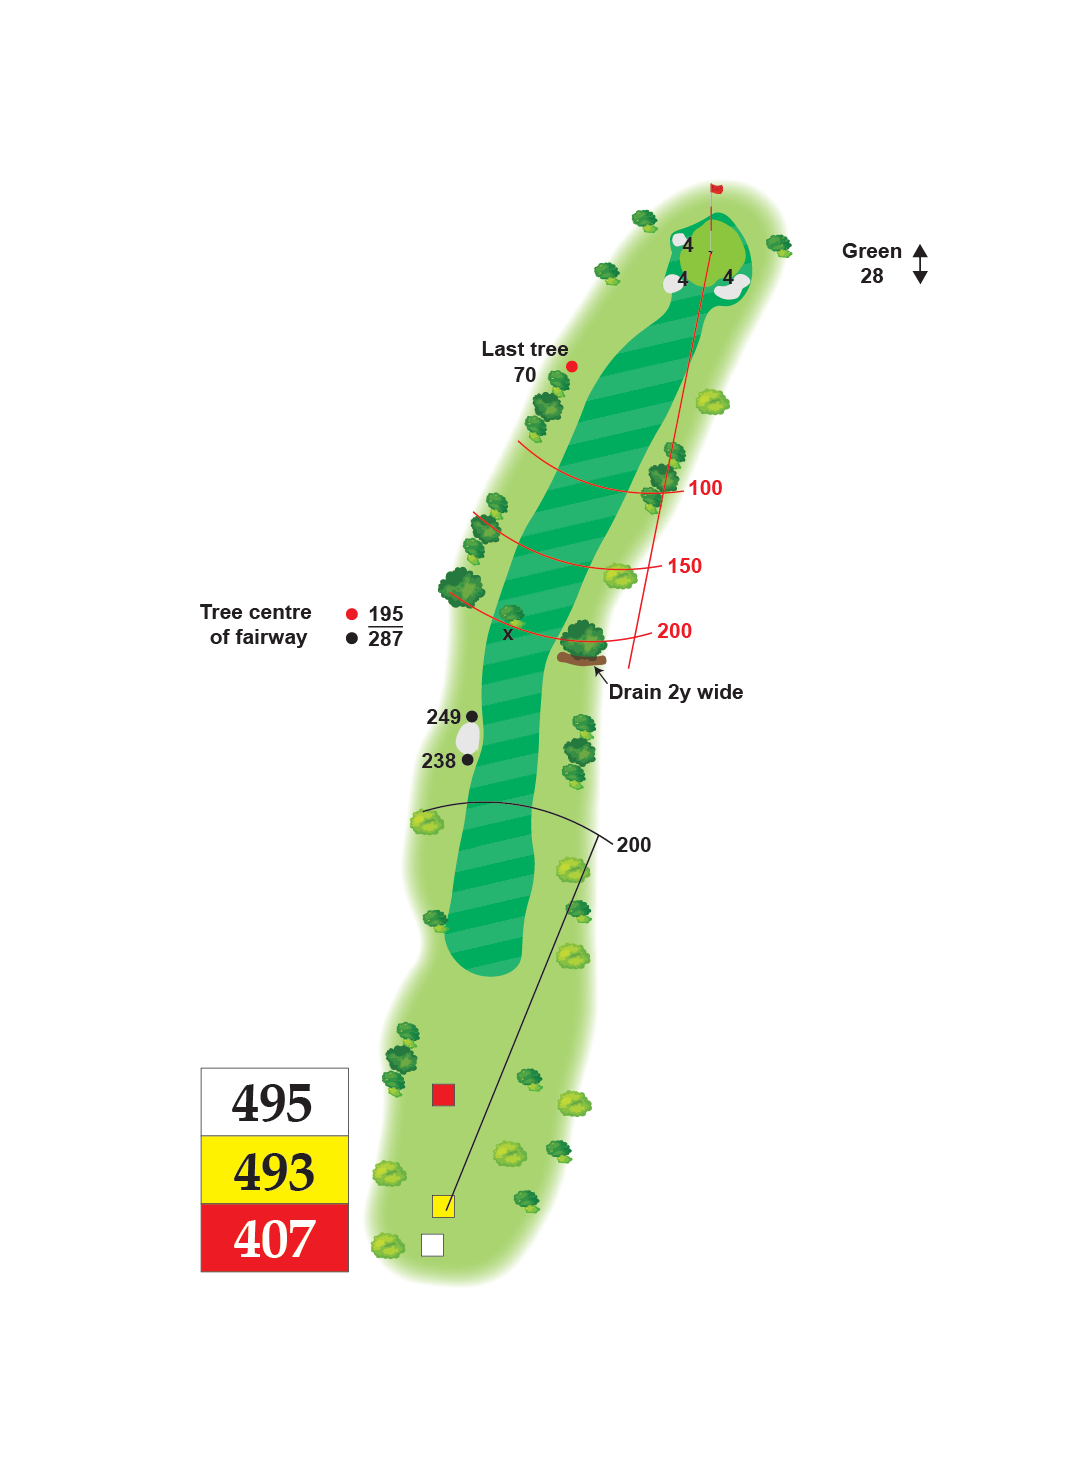
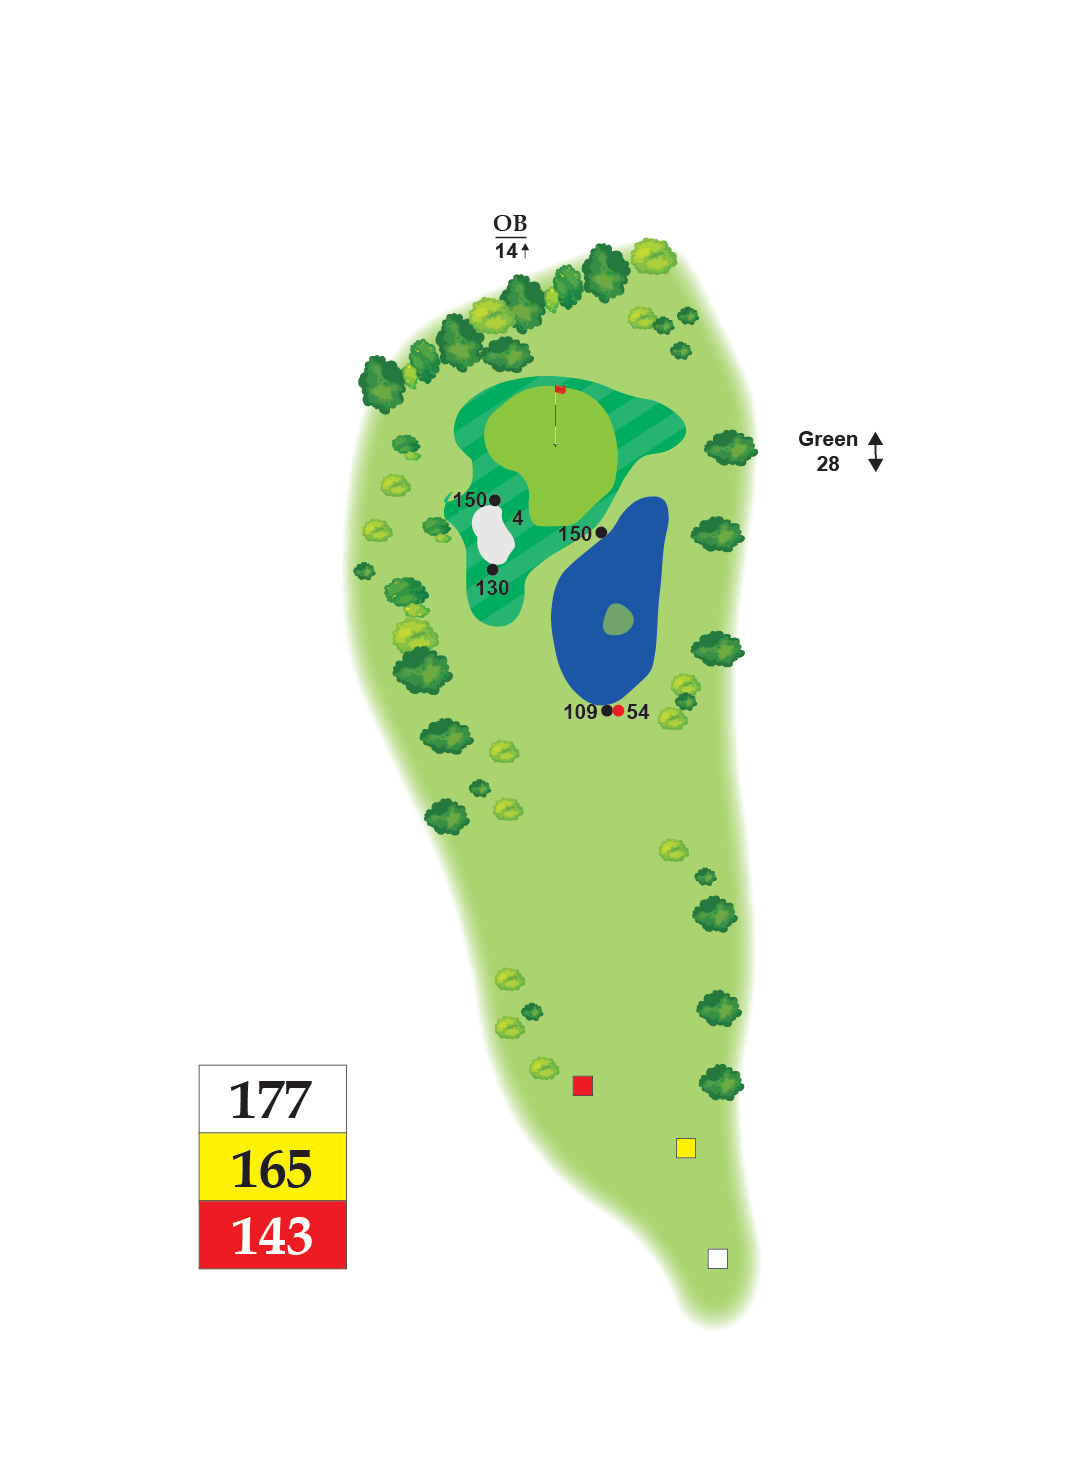
Hole 14 | PAR 5 | Index 11
Members Advise
A good drive that needs to find
the right side of the fairway, your
second may be blind but a great
chance to roll one onto the green
if you can make the distance.
All downhill to the green which
continues to fall away from you.
Hole 15 | PAR 3 | Index 7
Members Advise
A long par 3, make sure you have
enough club and aim for the heart
of the heavily sloping green which
would rather you chip again.
Past the pin means a likely 3 putt.
Hole 16 | PAR 4 | Index 15
Members Advise
Very picturesque hole with
Tara Hill as the backdrop.
Accuracy is key here as we
draw to a close. A long green
which is well protected by
slopes away to all sides.
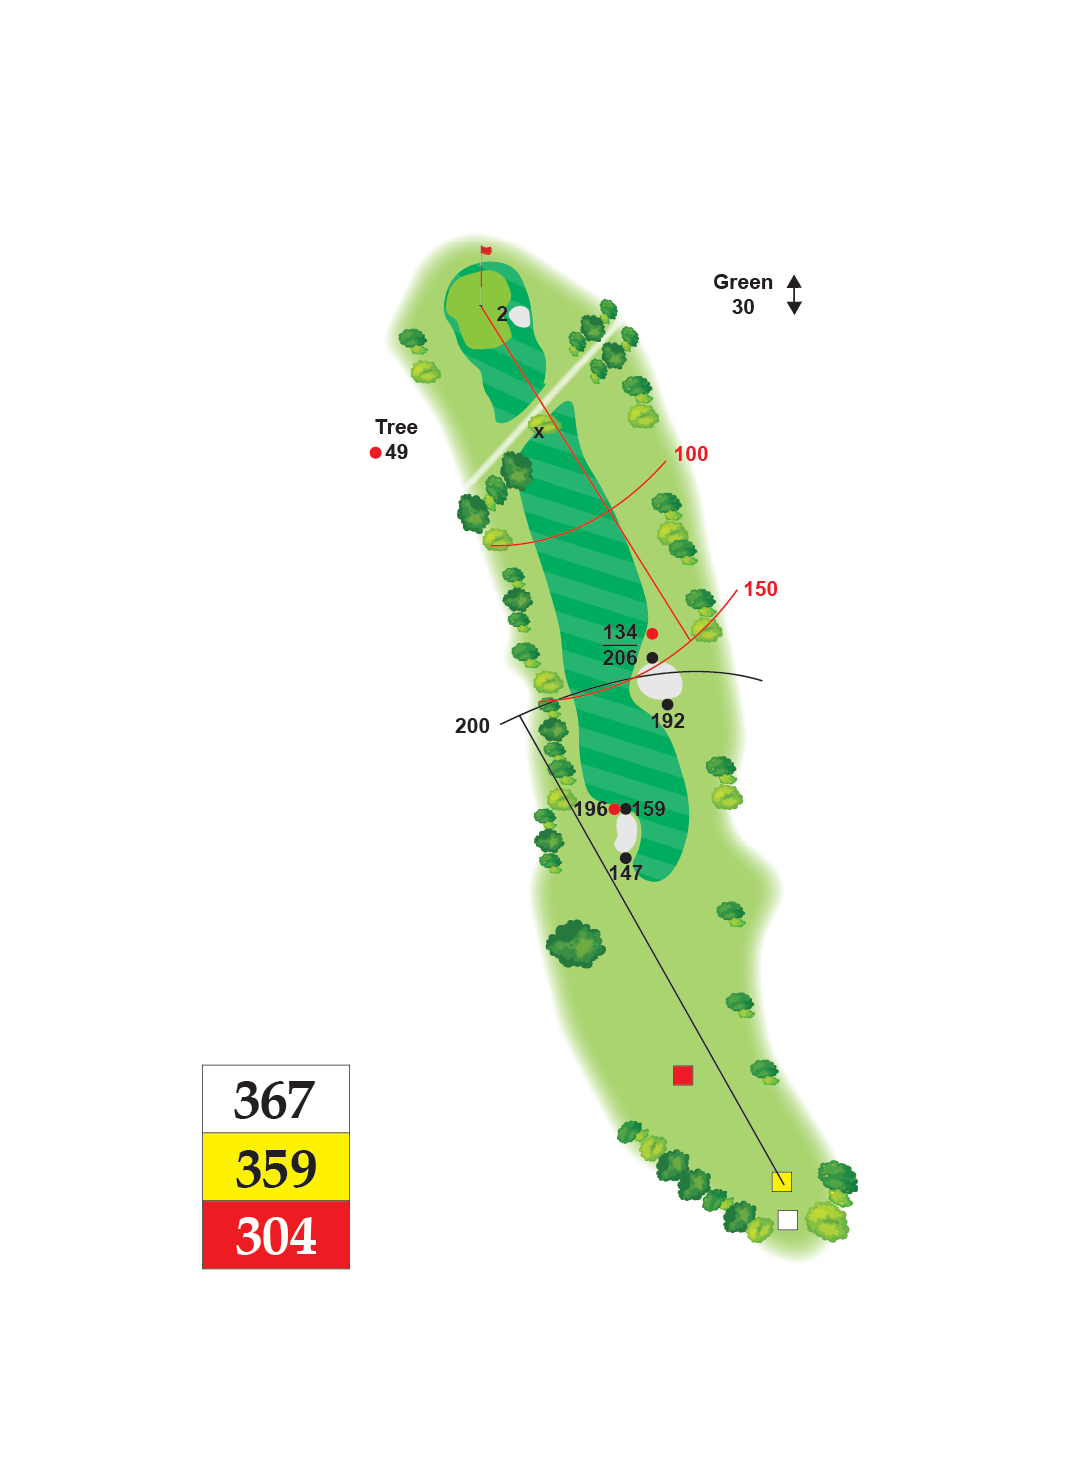
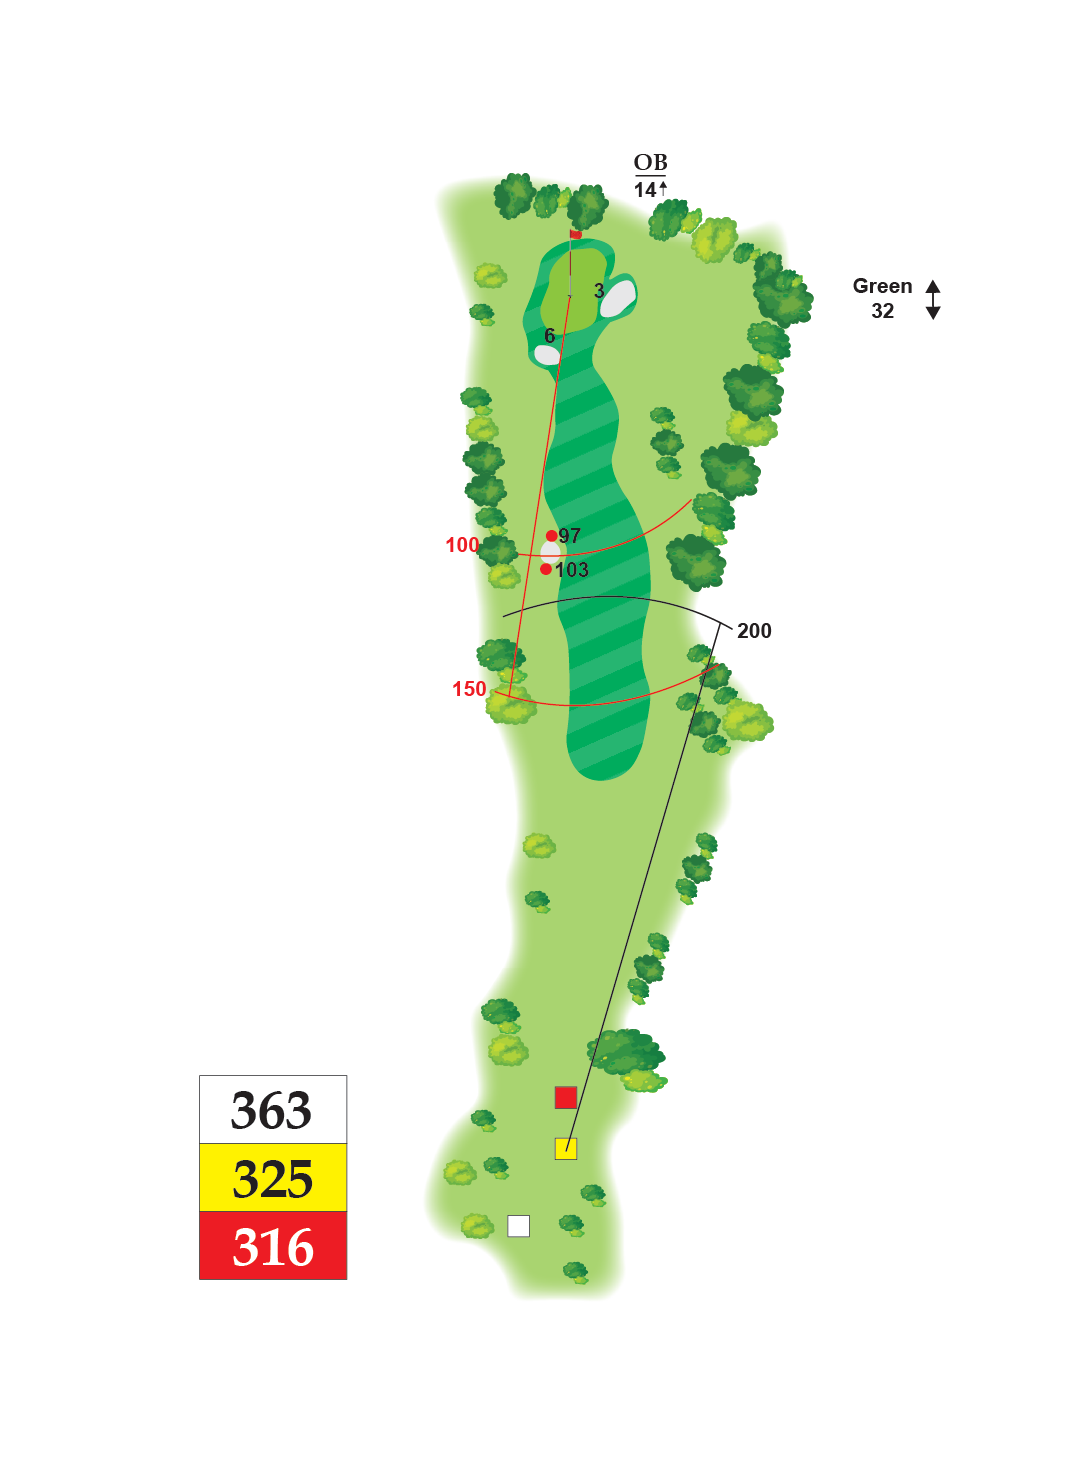
Hole 17 | PAR 4 | Index 3
Members Advise
Length can be a help but too close
to that tree and you’ll need to have
Seve’s hands, 35 yards from the front
of a dramatically sloped green,
will you go over it or around?
Hole 18 | PAR 3 | Index 5
Members Advise
A strong finishing hole that will
need full commitment to whatever
shot you choose. A bailout shot
up the left is commonly seen.
A great finish to a great round
(hopefully).
KEY
All measurements in yards
- Red dot - distance from centre of green
- Black dot - distance from yellow tee
- OB - Out of Bounds (usually marked with white stakes/lines)
- Where number x x = distance to centre
- y = distance from tee
- Green measurements are at its longest front to back
- Numbers at the back of greens signify distance to OB
- Numbers between bunkers & greens is distance from bunker to nearest point on the green